How do I use Account level Media Gallery tool?
Media Gallery tool in Sublime LMS ™ enables you to view, upload, and search video directly from your Sublime LMS ™ environment. This allows pictures, audio files and videos to be played directly within
Sublime LMS ™. Users can build dynamic collections of media that can be categorized, sorted and filtered based upon the categories created. It provides ease of use for students, teachers and teaching assistants. Once admin can has uploaded videos in account level Media Gallery, teachers and teaching assistants can use those videos directly in the course pages.
Open Media Gallery
Click the Video link in the account navigation.
View Media Gallery
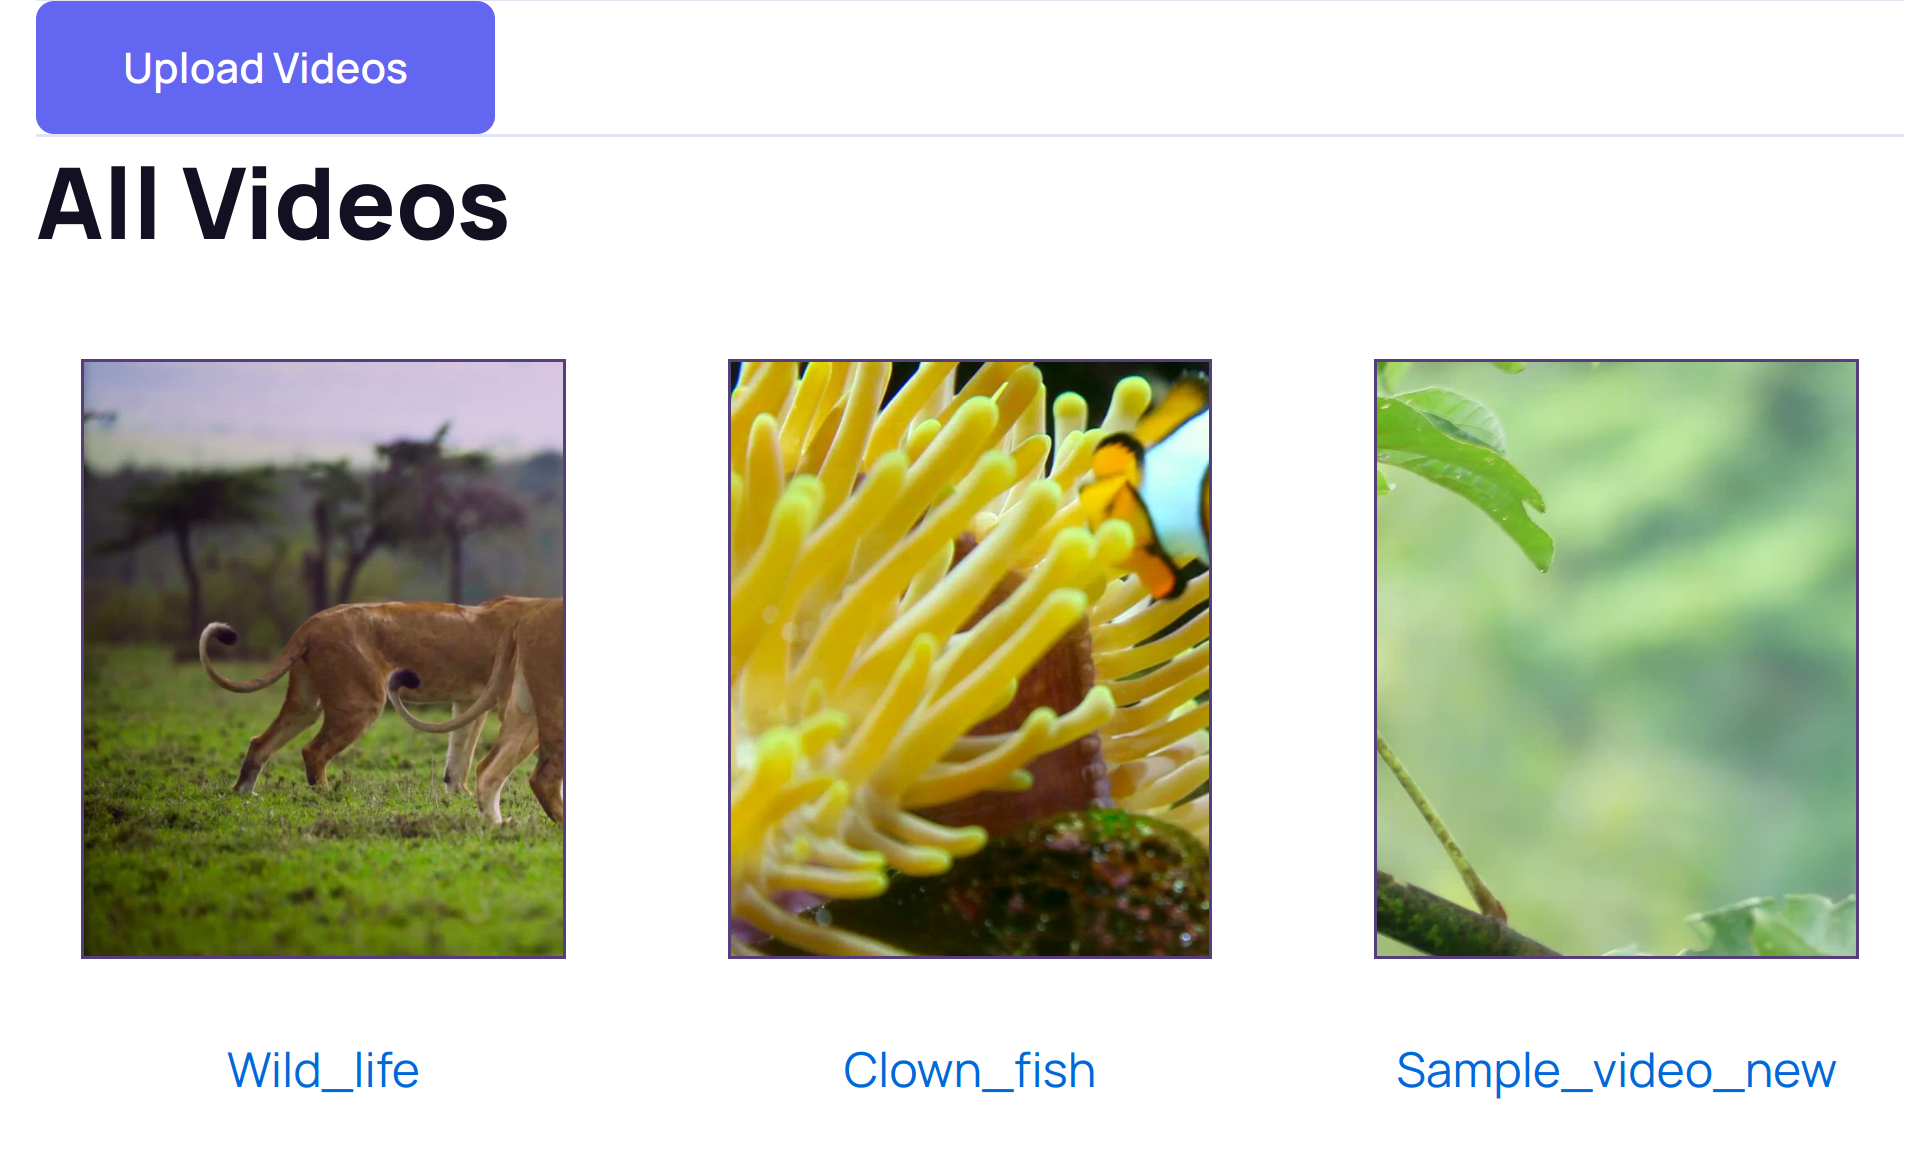
View the Media Gallery list in Account level.

1. In the Media Gallery, select an option from the Category drop down menu, Media with metadata that includes the category is displayed.
2. You can Add media, Record media, Add category and Manage those categories using Media Gallery.
3. On the Media Gallery, enter a search string (such as a tag or part of a title) in the Search field.
Media with metadata that includes the text is displayed.
To upload media from your desktop
Click Add Media button. The Add Media page is displayed.
Add Media
You can add new media to your Media Gallery.
To add a new media item, follow the below steps.
1. Click Select file or Choose file in the Select File to upload window, and then select a media file to upload and click Open.
2. You can add Video Name .
3. Click Upload button after you’ve selected a media file.
Note: You can add any video format to your media gallery.
Select Video
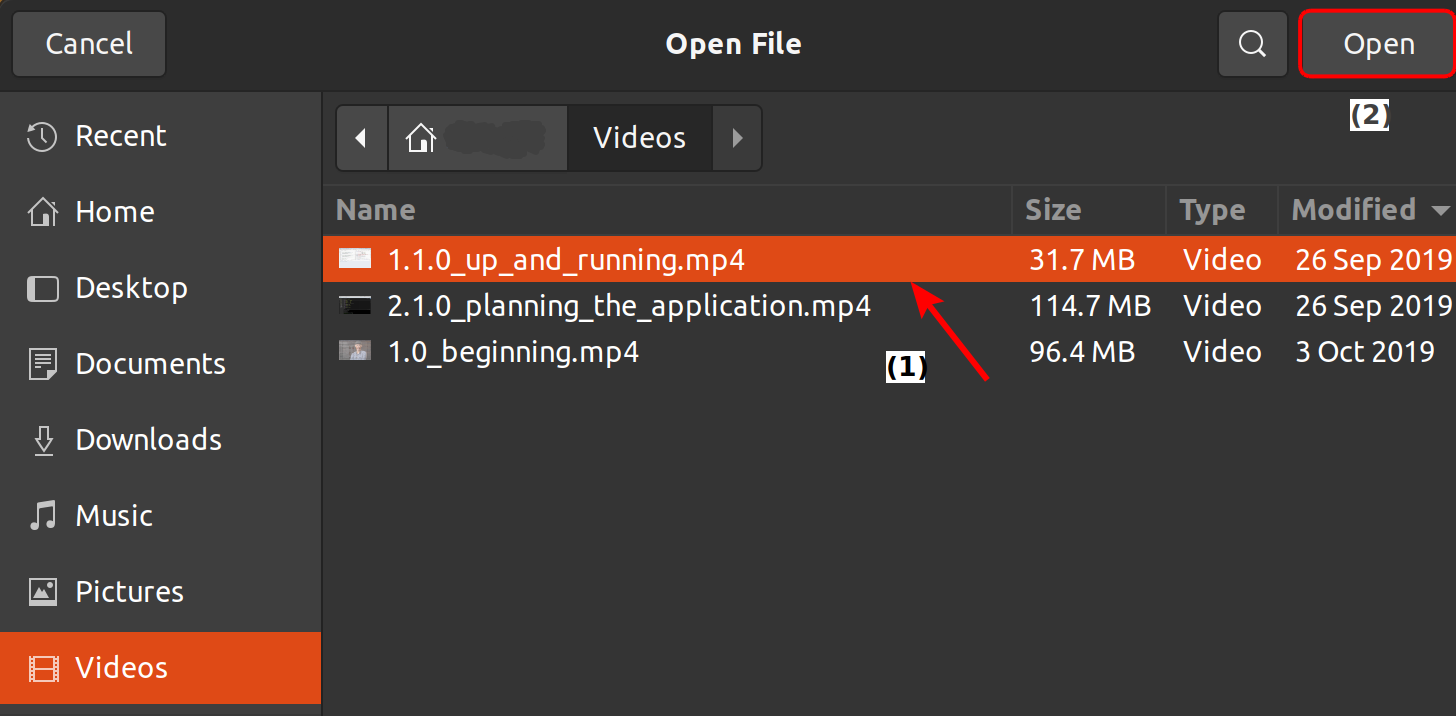
Choose the video file[1] and click Open button[2].
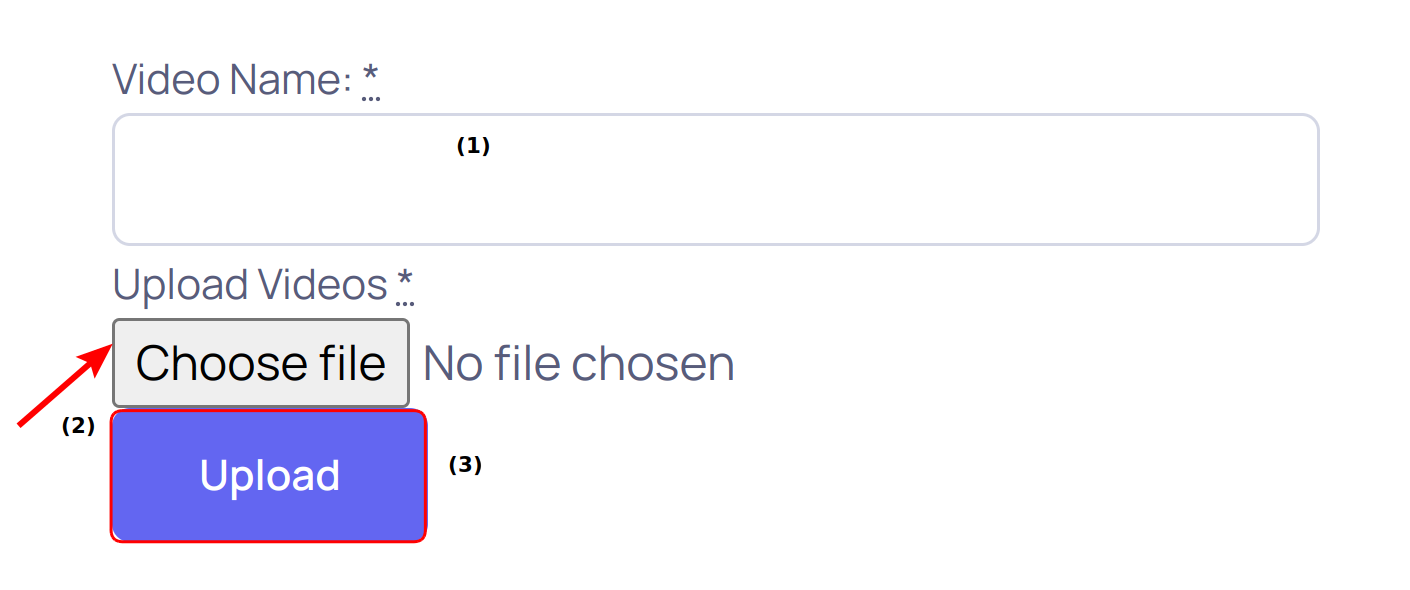
Add Media to Gallery
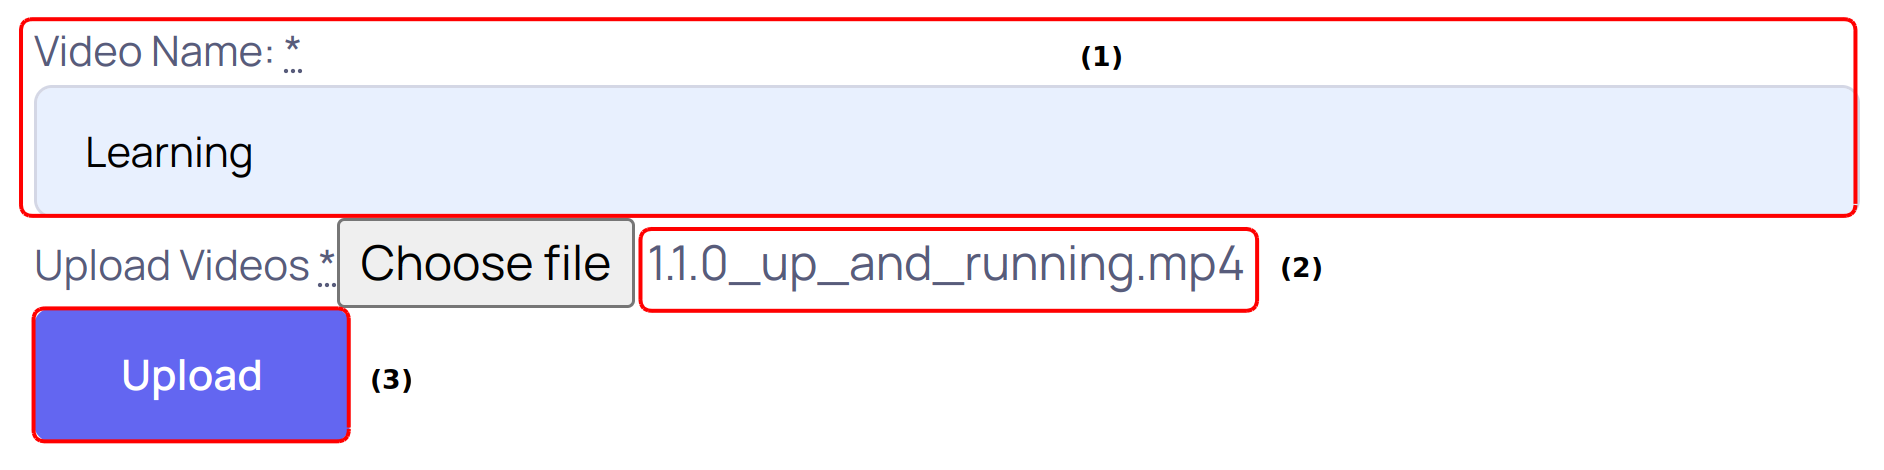
Give the video name [1] and view your selected file [2]. click the Upload [3] button to upload a new video to your Media Gallery.
View Uploding Progress
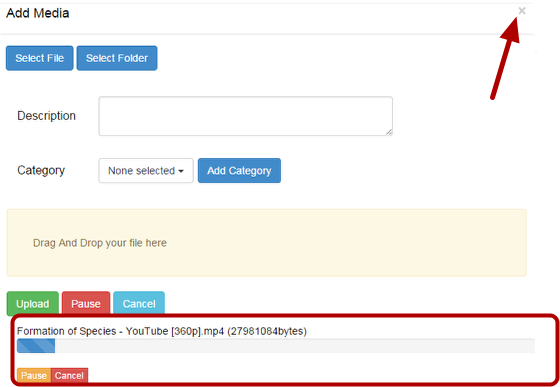
View your uploading progress. You can Pause or Cancel your uploading progress.
Once your file is uploaded, click X icon to close the window and Refresh (click F5 button in your keyboard for windows) the screen to view your newly uploaded media.
View Files
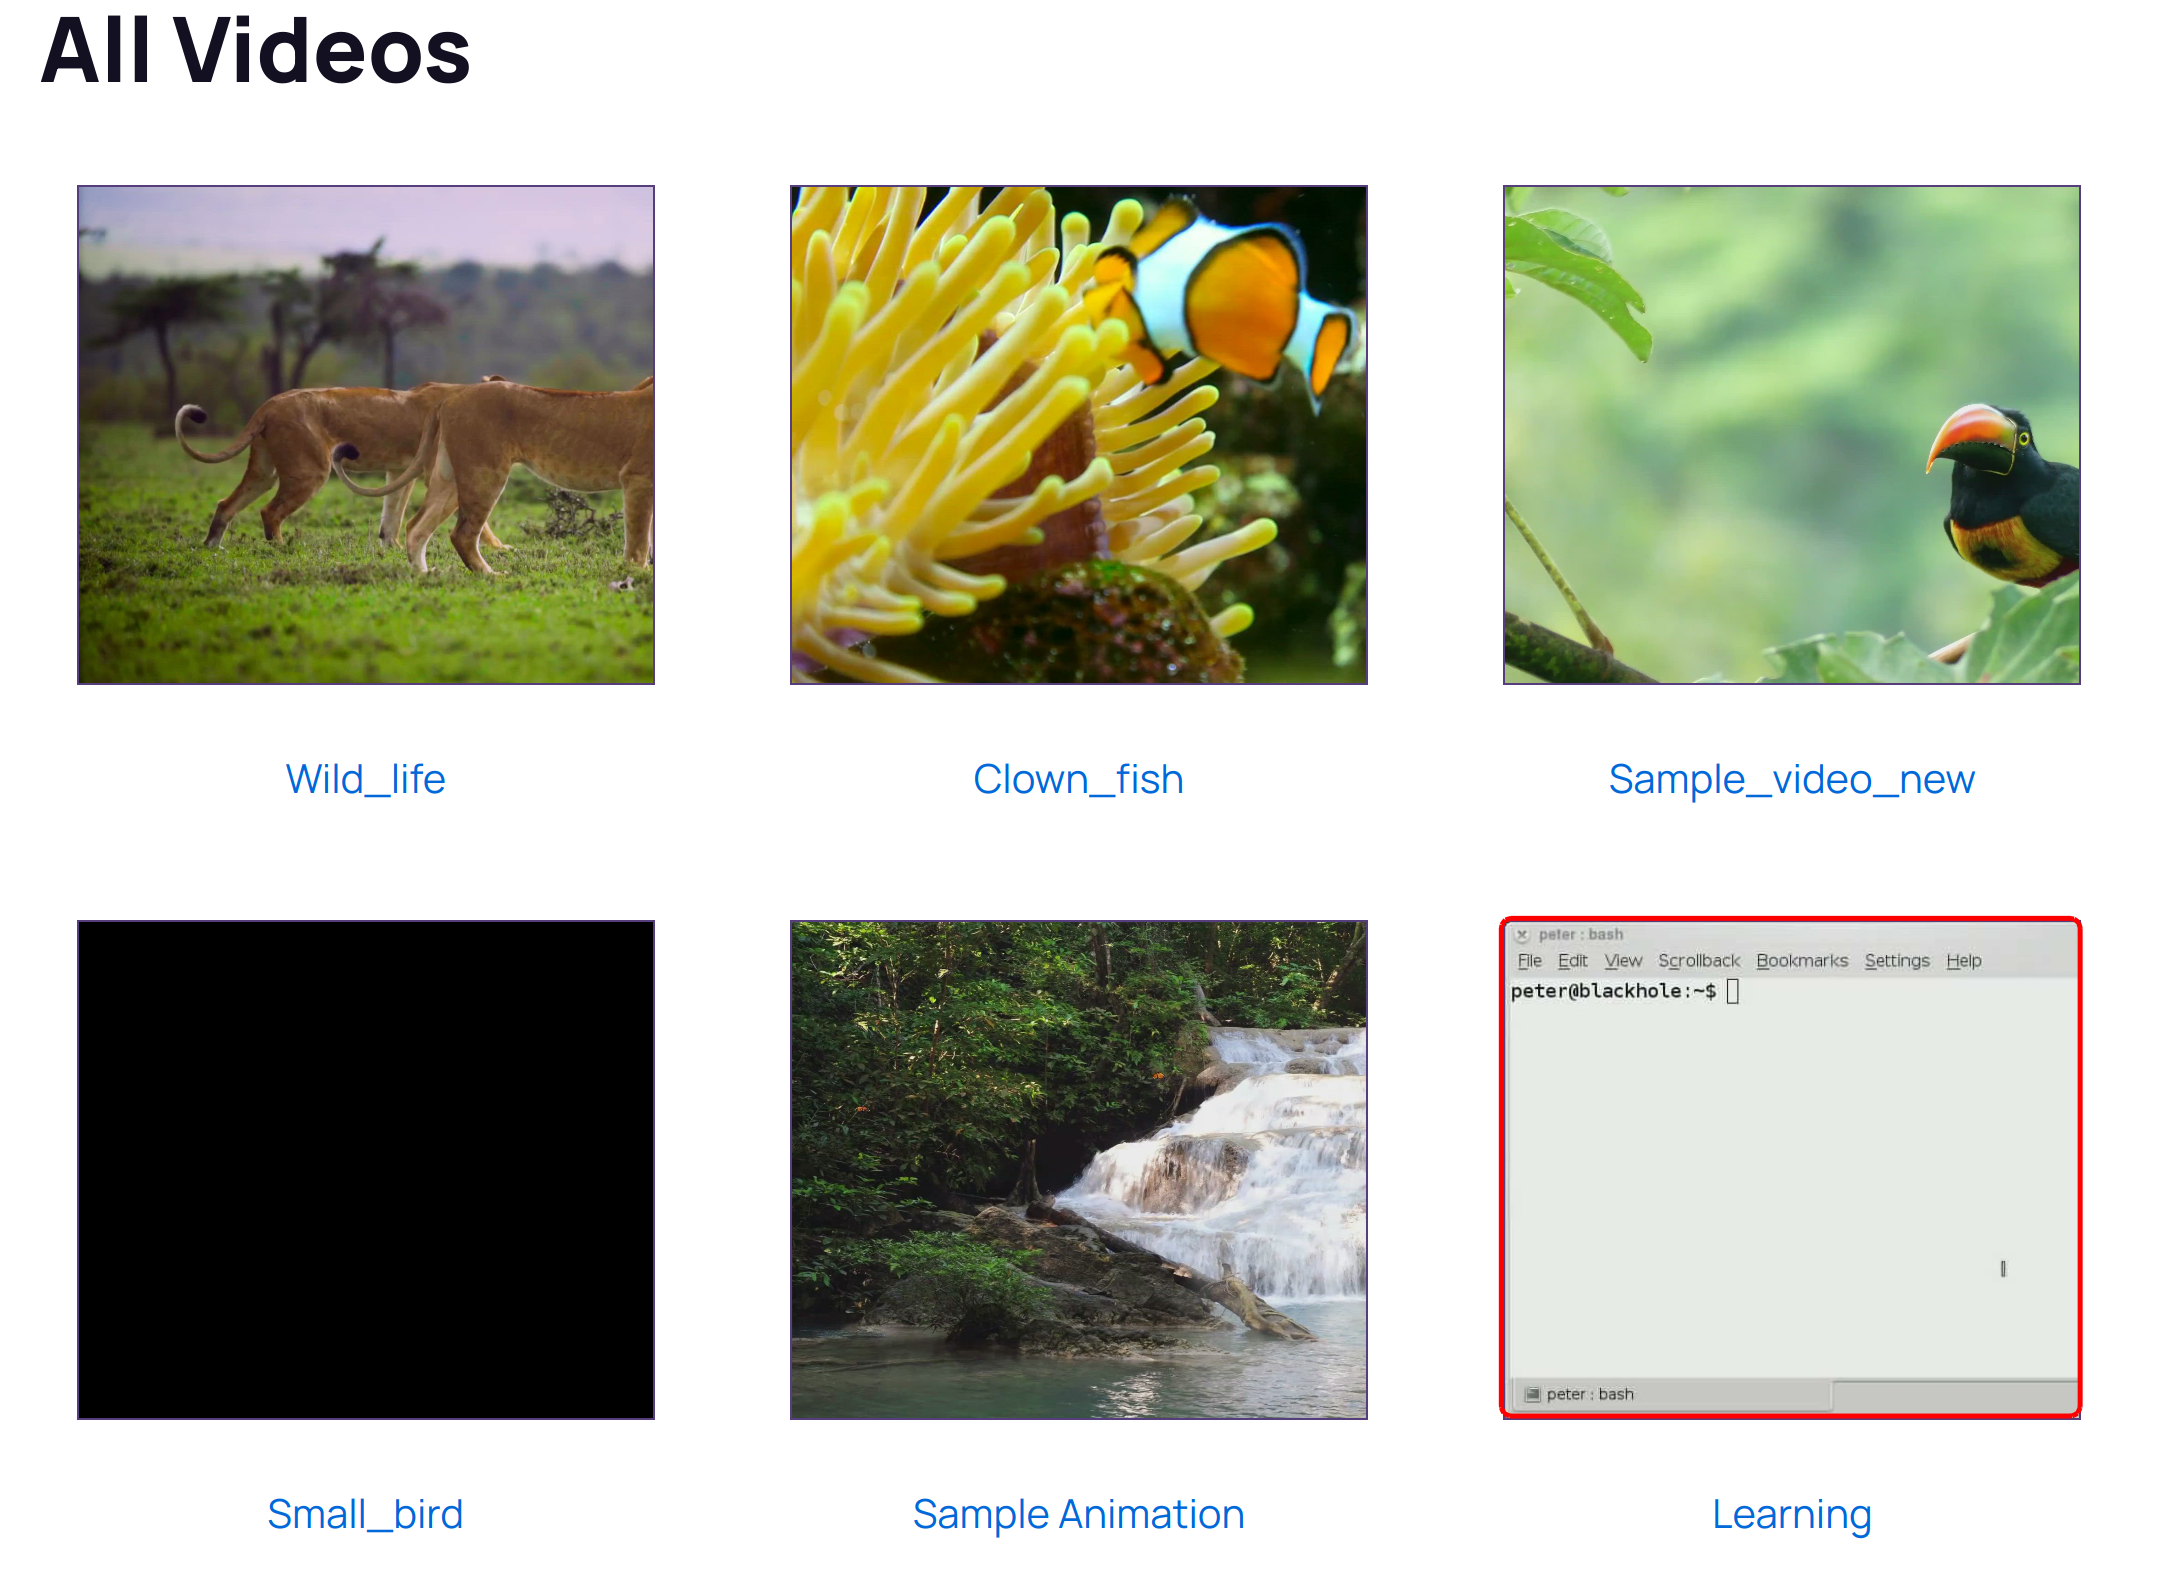
View your video in Media Gallery list.
Add Category
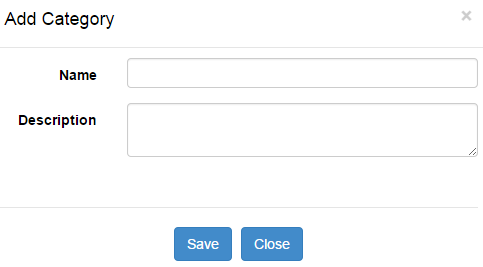
Click the Add Category button to add a new category.
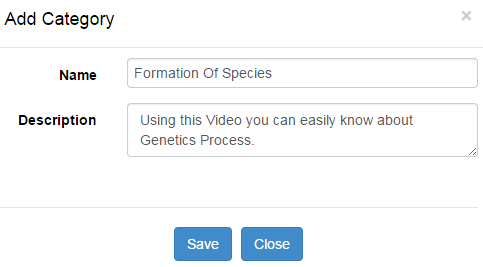
You can give the following details to add a new category
1. Name - Name of the category.
2. Description - Give description about the category.
3. Click the Save button.
Choose category
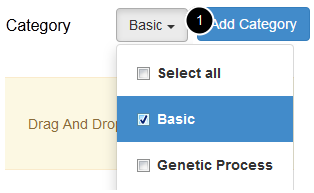
Click the Category [1] drop down menu to choose the category for your video.
You can choose more than one category or select all category options.
Using category option, you can view your videos category wise.
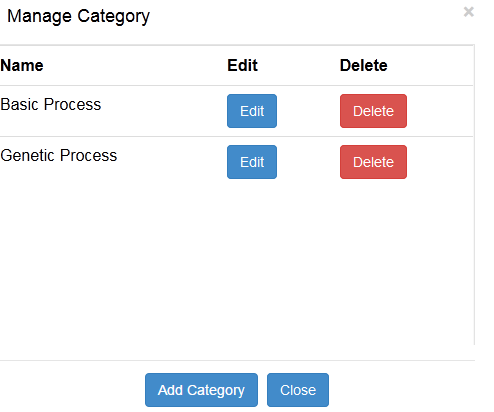
Manage Category
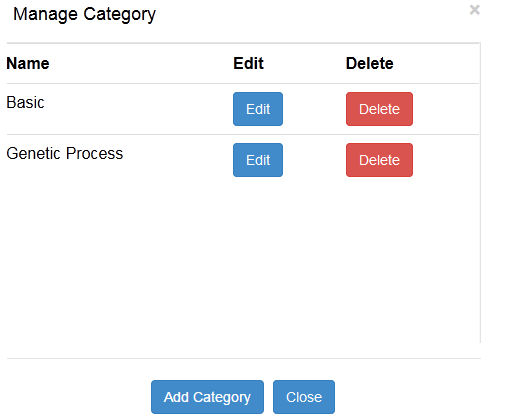
Click the Manage Category button to manage the categories.
You can Edit the category name or Delete any category.
Edit Category
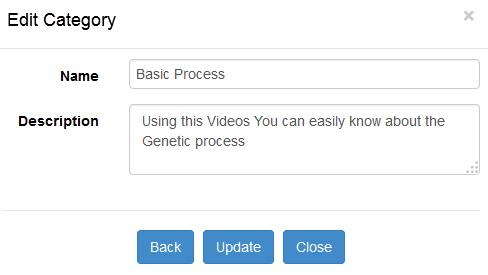
You can edit the Category Name and Description details.
Click Update button after editing the details.
Click Back button to view the category details.
Click Close button to close the Edit Category window.
View Details
View the category details after editing.
Record Media
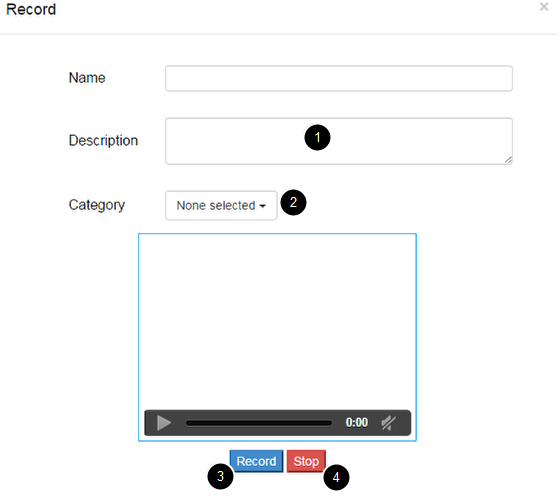
Use the Record from Webcam feature to create webcam media such as welcome messages, introductions, assignment instructions, simple demonstrations, and other recordings.
To record from a webcam:
1. Select Record Button.
The Record page is displayed.
2. In the Record from Webcam window, click Allow if a flash player message is displayed.
3. You can give name and description [1] about your recording. You can select a category [2] for your record.
4. You can record your own thoughts using web cam and mic options in your device.
5. Click Record [3] button to start recording, click the Stop [4] button to save your recording to the Media Gallery list.